This site
Introduction⌗
So, you want to start your own blog. You could use an existing service, such as Wordpress (the service, not the software) or Medium. I have to admit that I don’t know much about the ups and downs of such services, because I decided straight off the bat to take a more DIY approach. I wanted to write my posts in a code editor instead of a WYSIWYG editor, I wanted the site to be simple & fast & reliable, and I wanted it to be free or close to it. These requirements are pretty basic, so I had a whole world of options. What was the right choice for me?
If you just want to know what I ended up doing: skip to Hugo below.
The Right Approach⌗
Lets start with the options I ruled out as too hard:
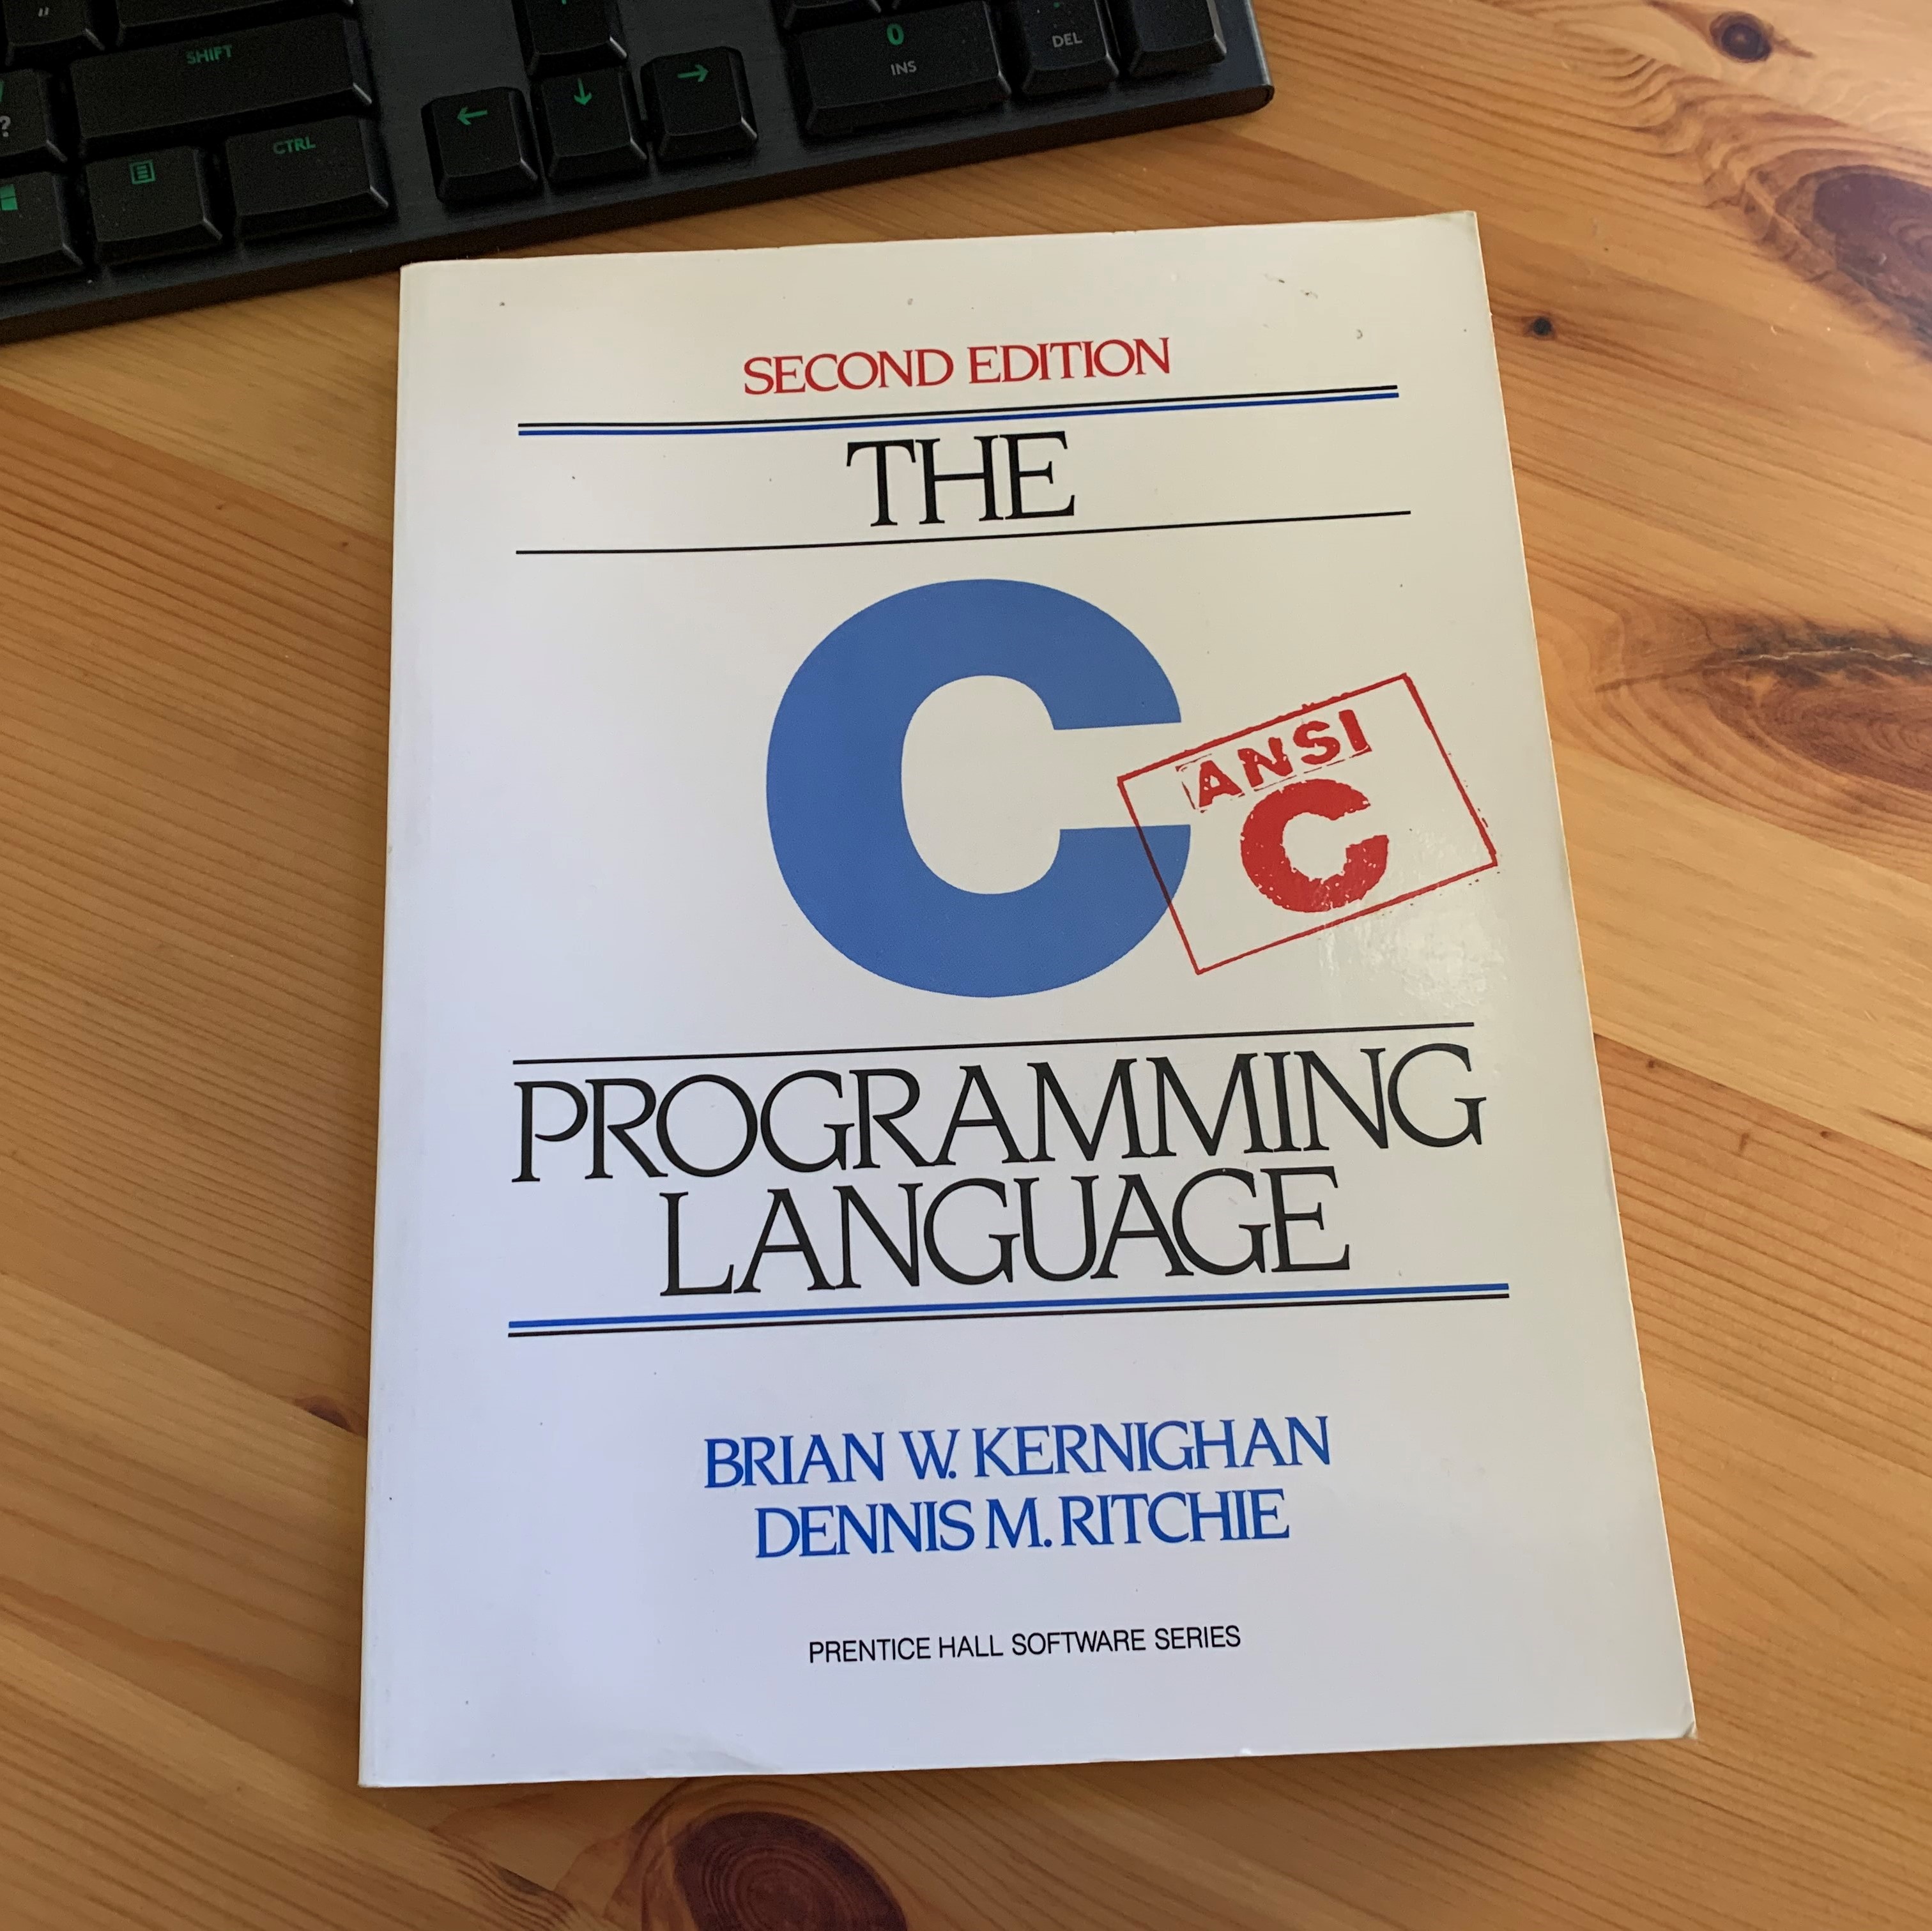
- Getting out my copy of The C Programming Language, loading up RFC2616 in a new tab, and firing up the C compiler
- Inventing a new universe and proceeding from there
Both these approaches would take approximately the same amount of time, and seem like far too much work to me. You certainly can write a web server in C, but lets just say that I’m glad I don’t have to. I don’t even want to write one in Go. In short: I don’t want to start from scratch. I want to stand on the shoulders of giants.
Select a Giant⌗
But which giants? On their face, technologies like React and Node.js and MongoDB, or concepts like content management systems and single-page apps, are great. They allow web developers to build some amazing things. So, for that matter, do slightly less bleeding-edge technologies like nginx, PHP, and MySQL. But with that richness of features and limitless flexbility comes a price: complexity. It takes effort to understand these technologies. It takes effort to implement them, and it takes even more effort to implement them correctly! Even if you go up a level and use an existing framework built on top of these technologies - for example Wordpress, which is built on top of PHP and MySQL - you’re still on the hook for setting up the underlying stack.
To host a site based on Wordpress and meet my reliability target, I’d need to think about:
- Domain registration and DNS hosting
- CDN/WAF/load balancer
- Front-end VMs acting as web servers
- Back-end VMs acting as database servers
I can draw an architecture diagram for that in my sleep, but thats not the point - there’s still a lot of layers to configure and maintain. Of course, you can pay someone else to worry about some of the details: you could replace the database servers with a managed service like Amazon RDS, and avoid thinking about database replication and how to create and restore backups and so on. You could replace the web servers with a managed service like Azure App Service and stop worrying about worker pools and operating system patching and load balancing. But those aren’t free services; they make a ton of sense for business-critical applications where the cost of getting it wrong is high, but they are a bit too “big iron” for my extremely small website.
And even leaving aside the issues with complexity and cost, I just don’t need the vast majority of the features that such an approach provides. I only need to be able to write some text and have it show up in your web browser, with bonus points awarded if that happens quickly and it looks nice. If you’ll allow me to be reductive for a moment: at its core, a content management system takes a bunch of code and data and transforms it into a HTML document. Since there’s nothing I want to do that has to be done on the fly, why not generate that HTML ahead of time? Then we don’t need a database at all. We also don’t need a customisable compute layer - we just need a really basic web server that can serve files. But before we get into how to serve the content, lets worry about how we’re going to generate it.
Hugo⌗
There are many ways to generate a static HTML page. You can even do it using Microsoft Word (I think? Is “save as web page” still a thing?). Anyway, don’t do that. Use something like Hugo. It will transform your scribblings into nice modern HTML/CSS. It can even add integration with Google Analytics and Twitter and so on, if you’re keen.
To get started, you’ll need to grab the hugo binary. The Hugo quickstart tutorial recommends using a package manager, but I found it easier to download the hugo binary from the releases page. Just unzip and add it to your path!
To create the basic folder layout for a new website, open up your favourite command line and run:
hugo new site mysite
cd mysite
From here, assume that we’re running all the commands in your ‘mysite’ directory.
I’d recommend making the folder a git repo for version control - this isn’t strictly necessary, but its generally a good idea.
git init .
echo "public/**" > .gitignore
Now you can add your theme as a submodule. I selected the Terminal theme:
git submodule add https://github.com/panr/hugo-theme-terminal.git themes/terminal
Writing a post for your site is now as simple as creating a Markdown file. Hugo will even help you do that:
hugo new posts/myfirstpost.md
To see what your site is going to look like, run hugo server -D and then point your favourite browser at http://localhost:1313/.
> hugo server -D
Start building sites …

                   | EN
-------------------+-----
  Pages            | 25
  Paginator pages  |  0
  Non-page files   |  0
  Static files     | 26
  Processed images |  0
  Aliases          |  8
  Sitemaps         |  1
  Cleaned          |  0

Built in 29 ms
Watching for changes in C:\Users\Edward\src\ed.rousseau.id.au-private\{archetypes,content,static,themes}
Watching for config changes in C:\Users\Edward\src\ed.rousseau.id.au-private\config.yaml
Environment: "development"
Serving pages from memory
Running in Fast Render Mode. For full rebuilds on change: hugo server --disableFastRender
Web Server is available at http://localhost:1313/ (bind address 127.0.0.1)
Press Ctrl+C to stop
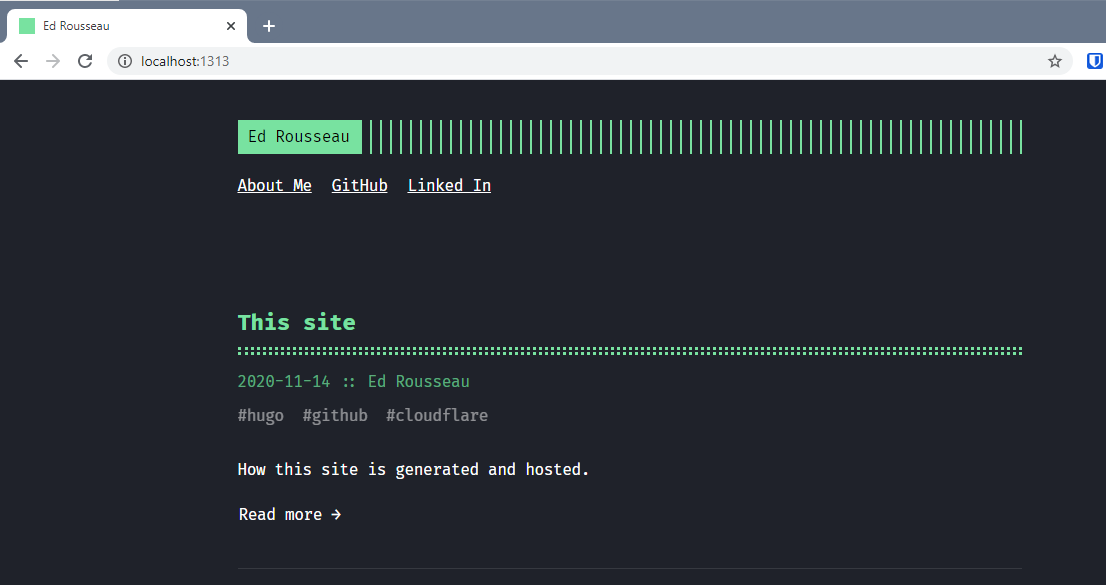
The -D tells hugo to include draft content.
When you’re happy, you can “build” your site by just running hugo. That should result in output along the lines of:
> hugo
Start building sites …

                   | EN
-------------------+-----
  Pages            | 12
  Paginator pages  |  0
  Non-page files   |  0
  Static files     | 15
  Processed images |  0
  Aliases          |  2
  Sitemaps         |  1
  Cleaned          |  0

Total in 65 ms
GitHub Pages⌗
At this point, we’ve got some static HTML (and we didn’t have to learn HTML, CSS, or javascript) but nobody else can see it. There are many options for hosting static HTML. In the past I’ve used AWS S3’s static website hosting option, fronted by Cloudflare’s CDN to add support for HTTPS. Hugo even has built-in support for this approach using the hugo publish command.
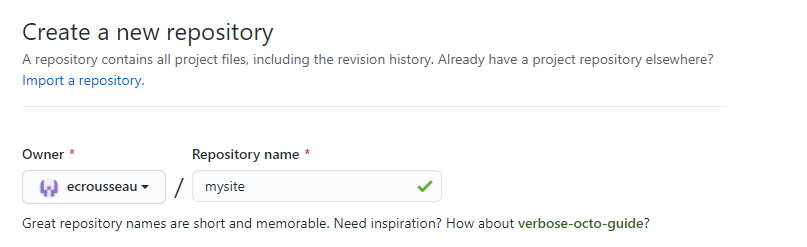
But this time, I decided to try something else, and use GitHub pages. To do this, you’ll need to create a public GitHub repository, push your static HTML content, and configure GitHub to serve them for you.
First, create the repository:
Then, generate, commit, and push your content:
hugo
cd mysite/public
git init .
git add .
git commit -m 'initial version'
git remote add origin https://github.com/ecrousseau/mysite.git
git push -u
Finally, configure GitHub Pages in your repository’s settings:
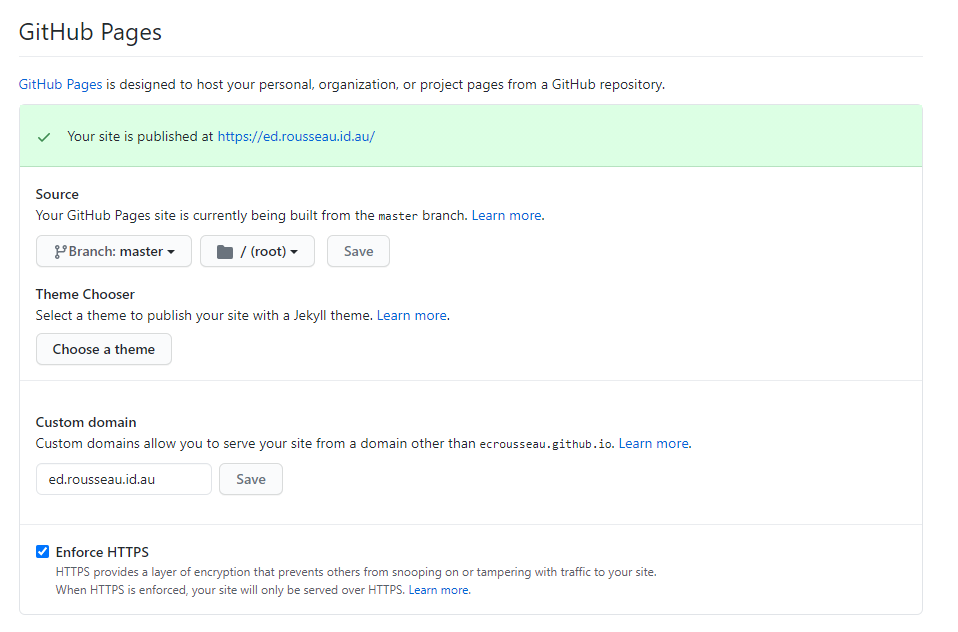
I used my own domain for this site, but you could stick to the built-in github.io domain if you like. The important part is to make sure the branch and the path are set correctly - your branch is most likely called master and the path should be set to / (root). Note that if you’re visiting from far enough in the future, the git commandline tool might have named your branch main instead.
A quick aside - if you’re using a custom domain, you need a DNS entry and a CNAME file. I use CloudFlare for DNS, so I created an entry like this:

Then you need a CNAME file - a text file containing your site’s domain name, so GitHub knows what to listen for. GitHub will actually add that to your repo automatically, but we need to make sure Hugo doesn’t delete it again. Do this by adding it to the static folder in your folder structure:
echo "my.domain.com" > static/CNAME
You might also need to adjust the base URL in mysite/config.toml. Mine is https://ed.rousseau.id.au/ but yours will be different. If you’re using the GitHub-provided domain, it’ll look similar to https://ecrousseau.github.io/mysite/.
At this point, GitHub should take care of serving up your static HTML content to visitors… and if you’re reading this, its working! You can check out the underlying HTML by viewing the repository in GitHub: https://github.com/ecrousseau/ed.rousseau.id.au.
GitHub is taking care of load balancing, compute, storage, networking, the whole works. They’re even paying the electricity bill (thanks GitHub!). This leaves me with the job of worrying about the domain registration and DNS hosting - which I’ve farmed out to CloudFlare, so no worries there either - and actually writing posts. Sadly I still have to do that myself…